How to Develop IOS Apps on Windows?

Have they thought of developing an iOS mobile app on windows ever hovering on your mind then this blog would be great learning for you. if you have thought of developing an iOS app on windows about 5-6 years back then it would not be possible, but now times have changed. Let us find out how to develop an iOS app on windows.
Earlier there were few issues that were holding up the development of an iOS app on windows. One of them was the Xcode, the integrated Development Environment(IDE) that was used to design and develop an iOS app. Xcode includes a swift compiler, interface builder and other required tools to upload your app to the app store. Now Xcode contains everything that you’ll need to create an iOS app. But still, one issue still persists that it is only compatible with Mac OS.

Another issue that persists is that you can’t buy any PC with Mac OS on it, unlike windows. Apple doesn’t let you license its OS with other manufacturers. When you purchase an OS X, you can license to only run this OS on Apple hardware. This limits you to develop apps that run only on Max. So, here are the ways by which you can develop an iOS app on windows.
1. Use Virtualbox & Install Mac OS on your Windows PC
It is the quickest way to develop iOS apps on windows. A virtual machine will create an environment where any operating system can run in like it’s running in the same hardware itself. It is called virtualization because it allows you to run Windows on Linux and even Windows on OS X. You’ll need two things to run Mac OS on a virtual machine.
A. A copy of OS X as a virtual manager file or an installer.
B. A virtual Machine tool like VirtualBox or VMWare.
You can acquire a duplicate of OS X by downloading it from the App Store. You can likewise find installers from different sources on the internet. Remember that utilizing Mac OS on non-Apple hardware is against Apple’s End User License Agreement (EULA).
2. Rent a Mac in the Cloud

Another way to get OS X in your hands is to lease a Mac in the cloud, although it will cost you more. Services like Mac-in-cloud and Mac Stadium offer affordable Mac products on rent. You can connect with those cloud-based Macs by means of Remote Desktop Connection(RDP). Windows provide a stock remote desktop that you can utilize. Once you’re signed in, you can install Xcode and your iOS app development services.
3. Build your Own Hackintosh

The most evident choice iOS app development services on a Windows PC is maybe to actually install OS X on a windows PC. Apple enthusiasts have always enjoyed the integrated user experience, design, and inter-connectivity the tech giant has offered. A Hackintosh is a PC that tuns Mac OS. It is the same as installing an OS X in a virtual machine, likewise, you can install OS X as a bootable OS to your PC.
4. Create iOS Apps on Windows with Cross-Platform tools
Cross-platform tools are another option that you can opt for, with this you can code your application once and export it to iOS and Android. It will help you cut your application development time and cost into half. A few cross-platform tools enable you to create iOS applications on a windows PC or allow you to compile the application if there’s Mac within your network.
A regularly heard argument against cross-platform app development tools is that they offer restricted access to and support for smartphone hardware, and are less “smart” than their counterparts. Remember that any cross-platform tool will expect you to compose platform-specific code at a certain point, particularly if you need to code custom features.
5. Code with a Swift Sandbox
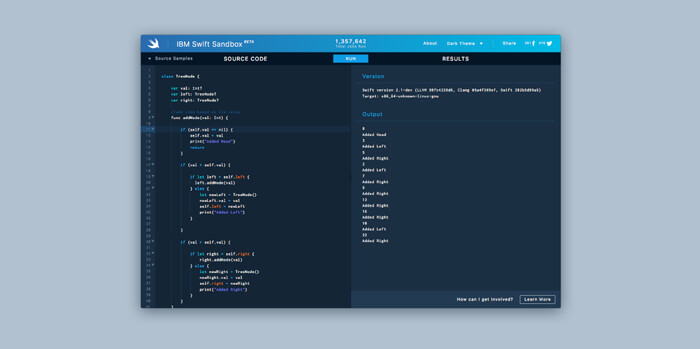
Swift is a great open-source language, which implies that you can effectively run it on any hardware. Accordingly, you can likewise run it in your browser too- if the language is ported to Chrome, Safari, or Firefox.
Here are the different ways to run Mac OS X on your windows system. iOS development is all about learning about Xcode. Once you get it then you will be on the right path then you will complete everything in no time and will start the app development on your Windows device.